Luna Blue Gifts Shop

Thursday 10 April 2014

Spring Blossoms Polymer Clay on Reclaimed Wood

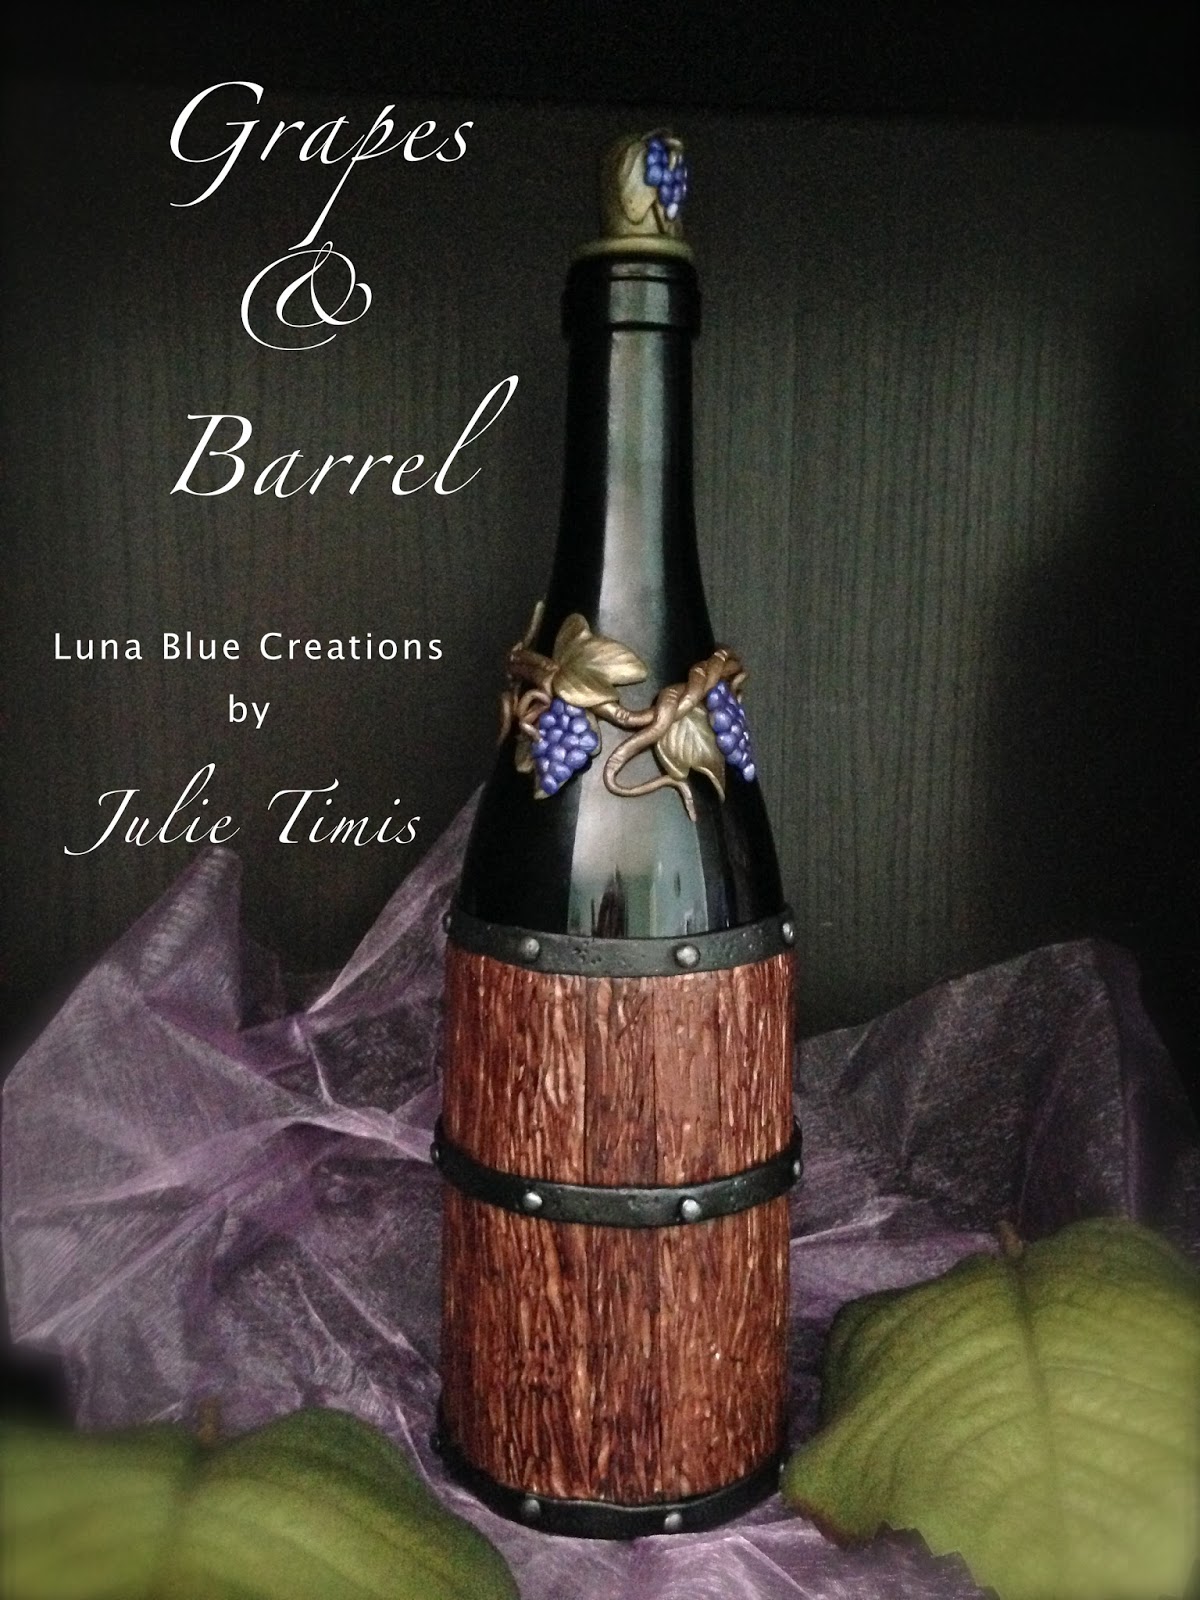
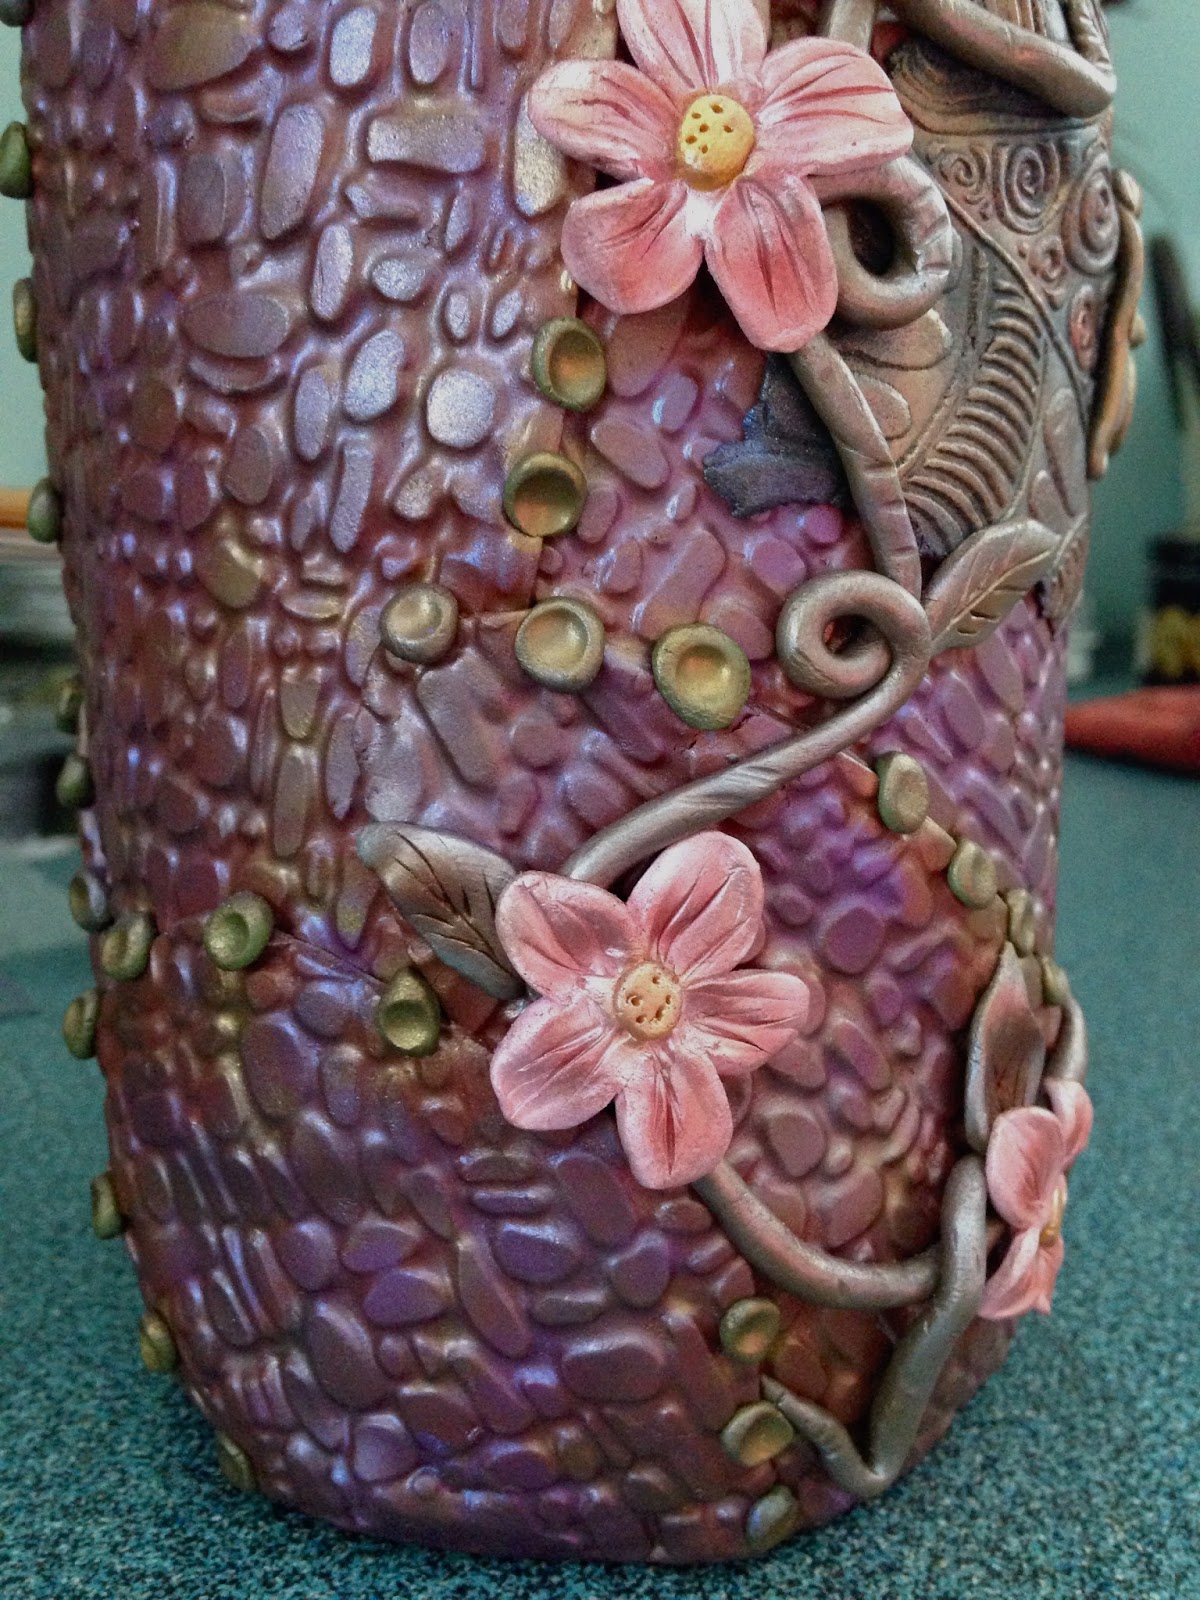
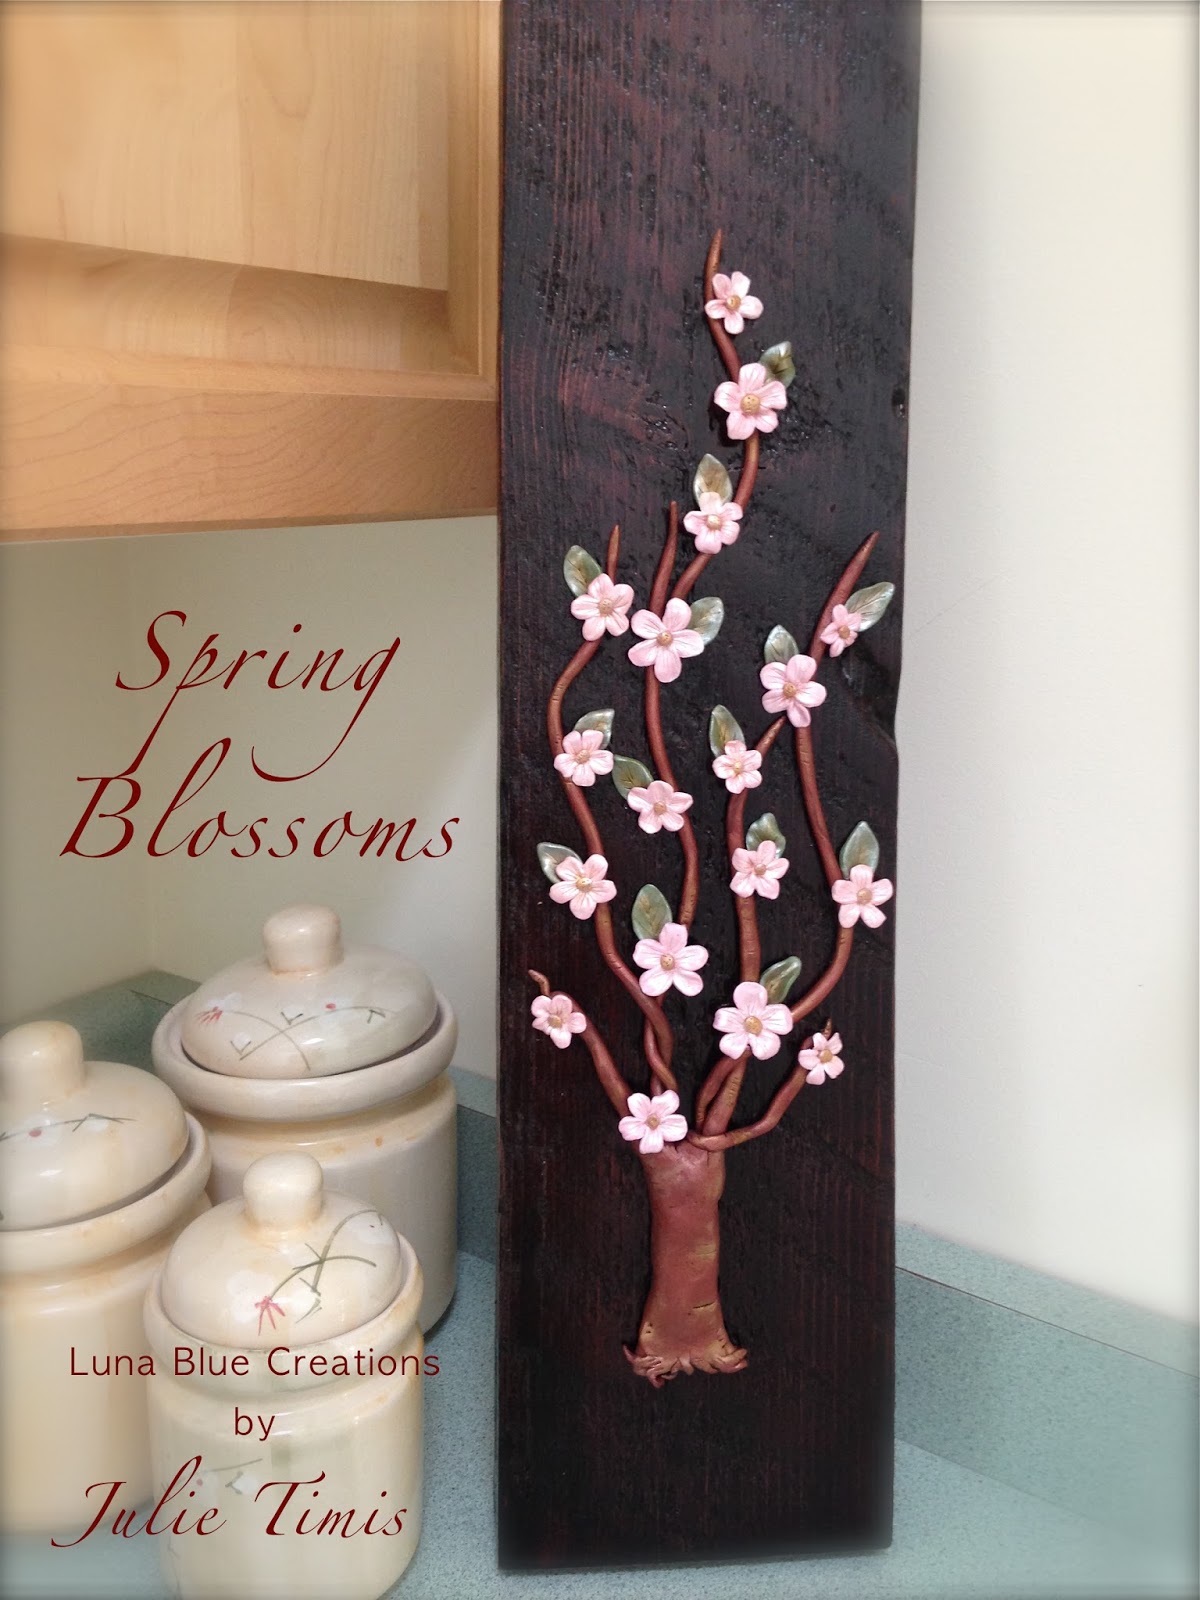
My first spring project for this year. Polymer clay on reclaimed wood planks. A friend of mine asked me to create a wall decor using polymer clay flowers and reclaimed barn wood.
I thought it's going to be a pretty interesting project to try since it will be my first time to work with polymer clay on wood.
I have read forums that you can bake polymer clay as long as they are bonded on the wood. Wood is porous material, so clay don't adhere well on it after baking. The design I have in my mind was using a 2" x 6" x 24" reclaimed lumber, there's no way it can fit in my small oven so, I decided to sculpt the designs and details, bake it, finish it and glue all pieces together on the wood surface. The project turned out really well.


Materials used for this project:

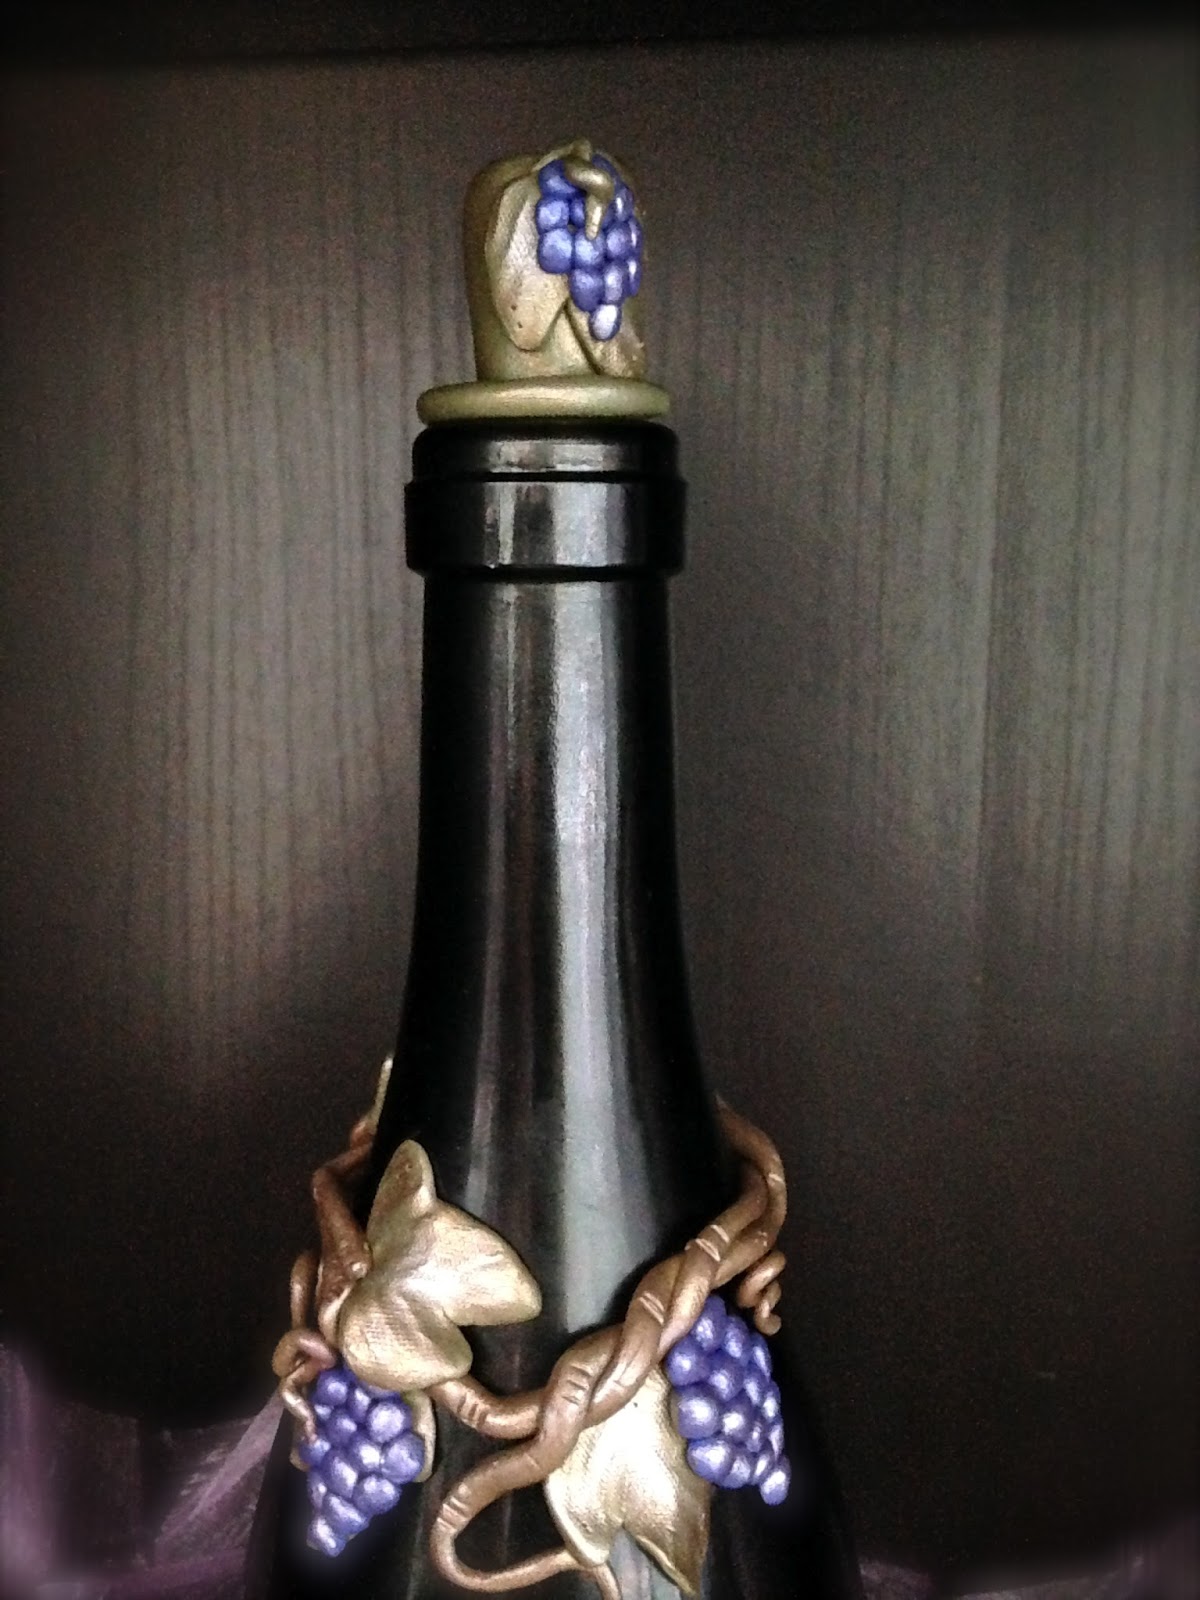
White & red premo clay to create pink clay for flowers
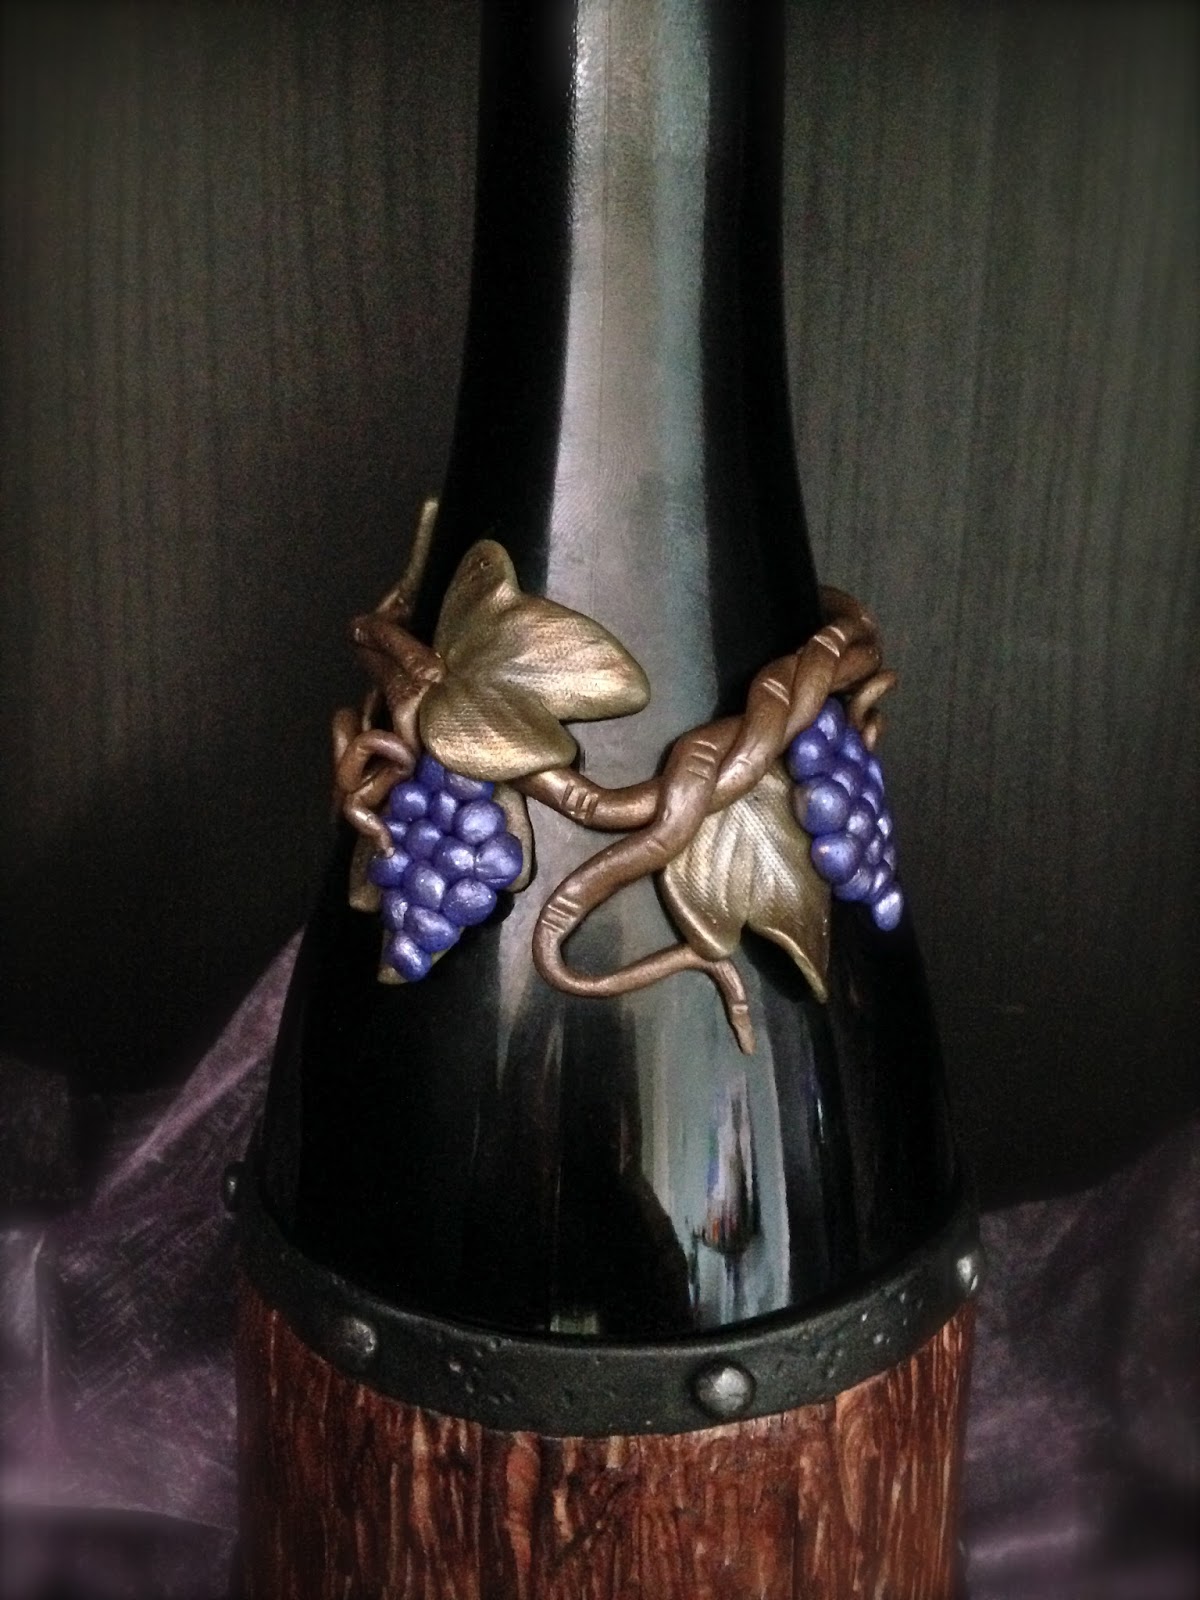
Olive green premo clay for the leaves
Accent copper premo clay for the tree
Yellow clay for the middle of the flower
Pearl ex - pink, gold & pearl
3M glue 
Tools

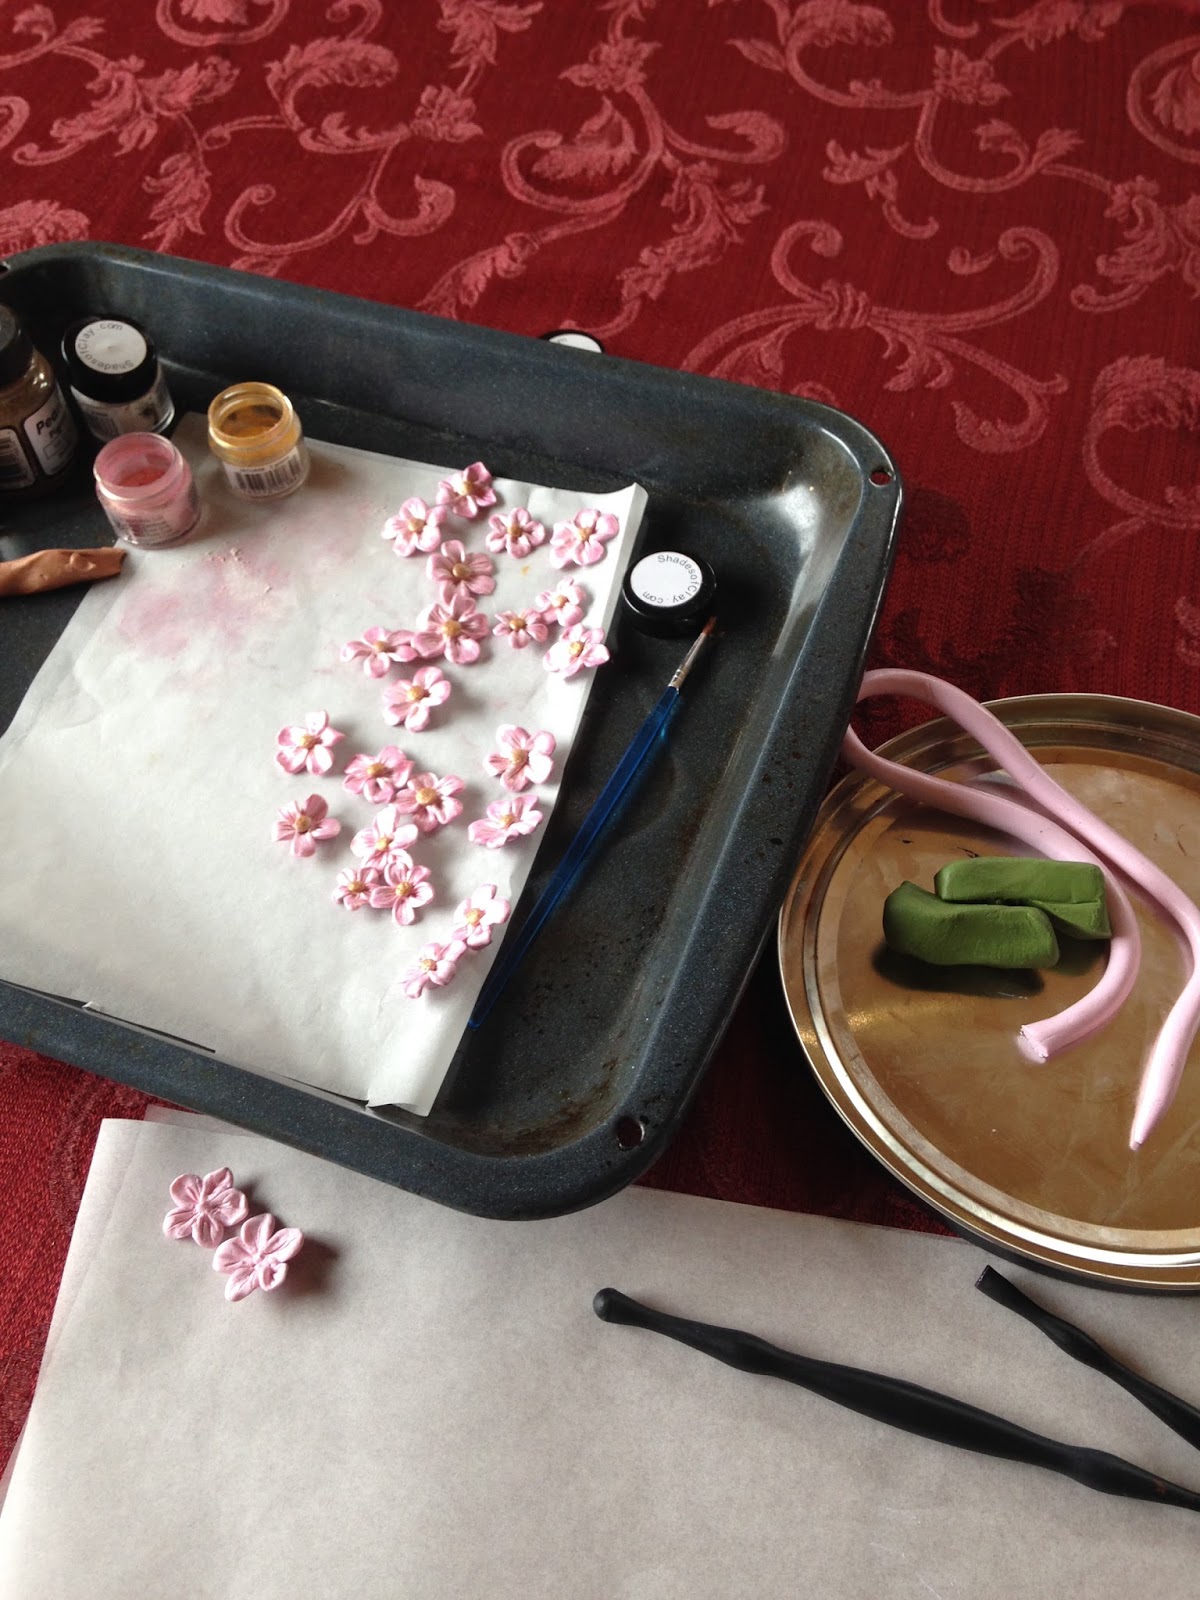
I sculpted the flowers, leaves & tree individually. I finish the look of the flowers with pearl ex (pearl & pink) 
This process took long.
I made 60 pcs. of the flowers and about 30 pcs. of the leaves.

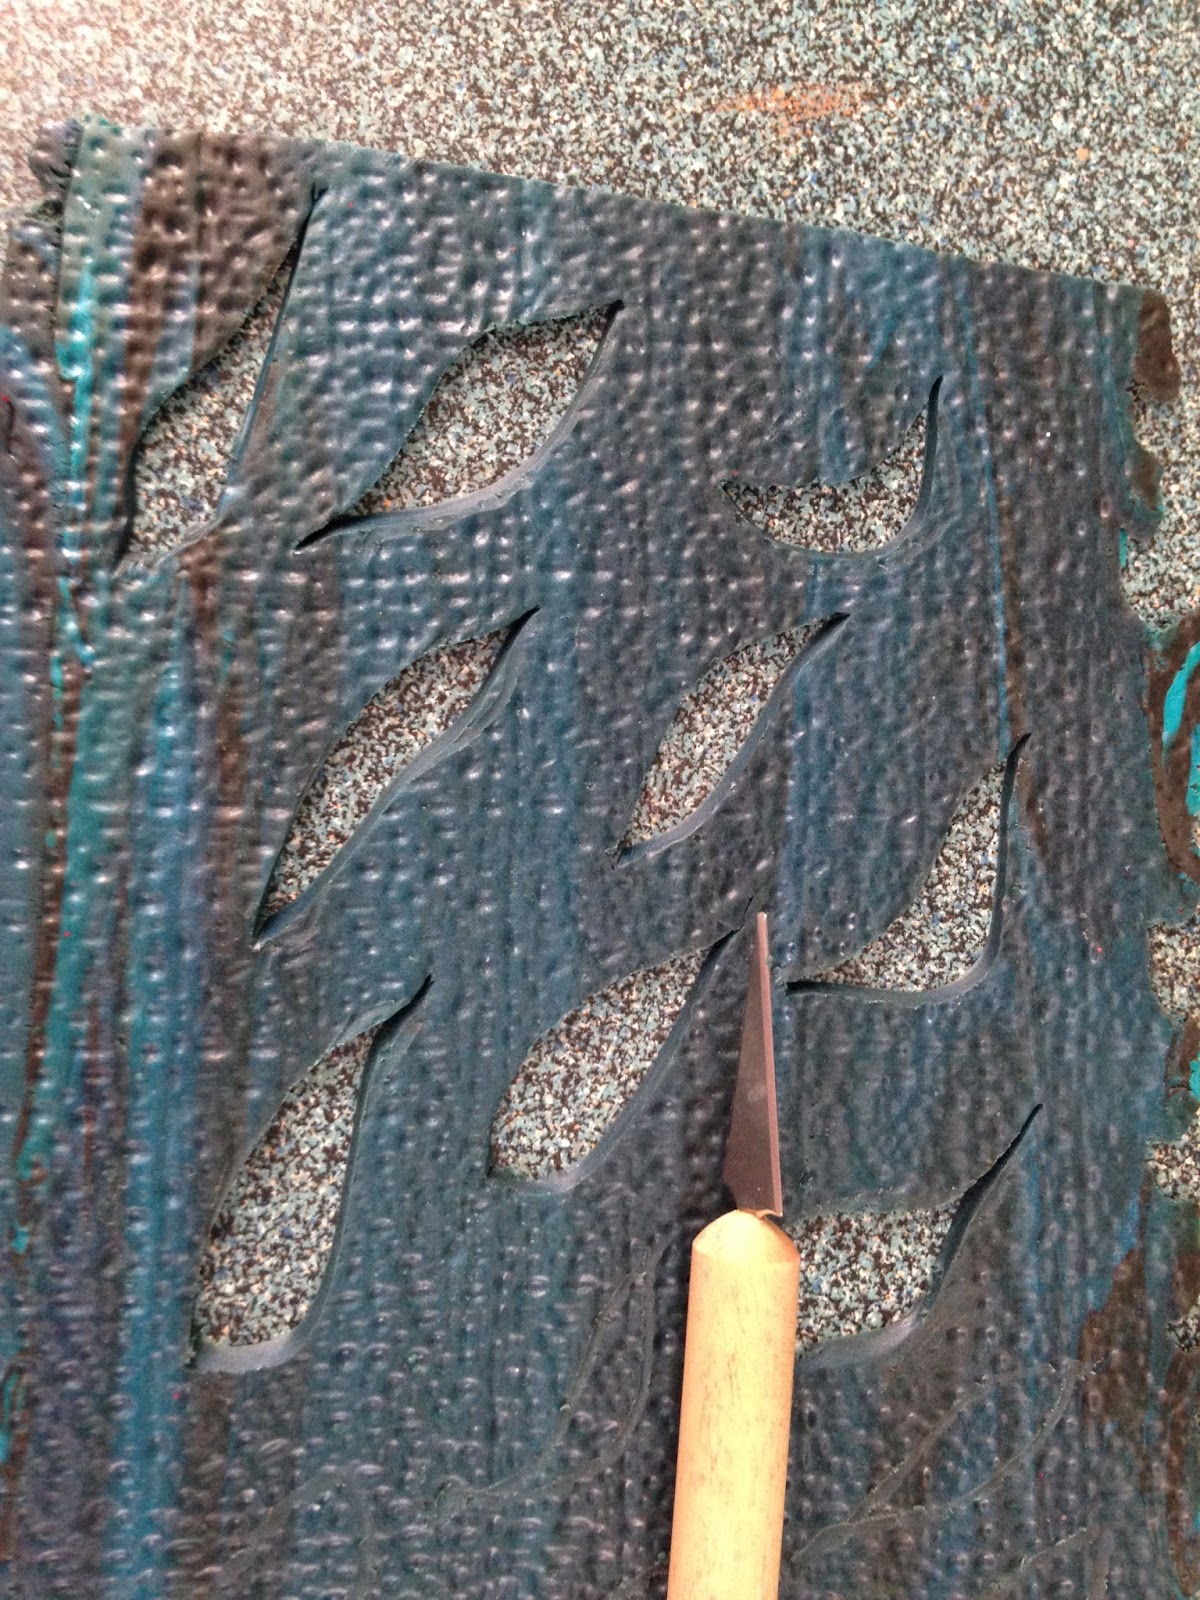
For the leaves, I use a small teardrop cutter and use silk leaf for impresssion.
I finished it with pearl ex ( pearl and antique gold)


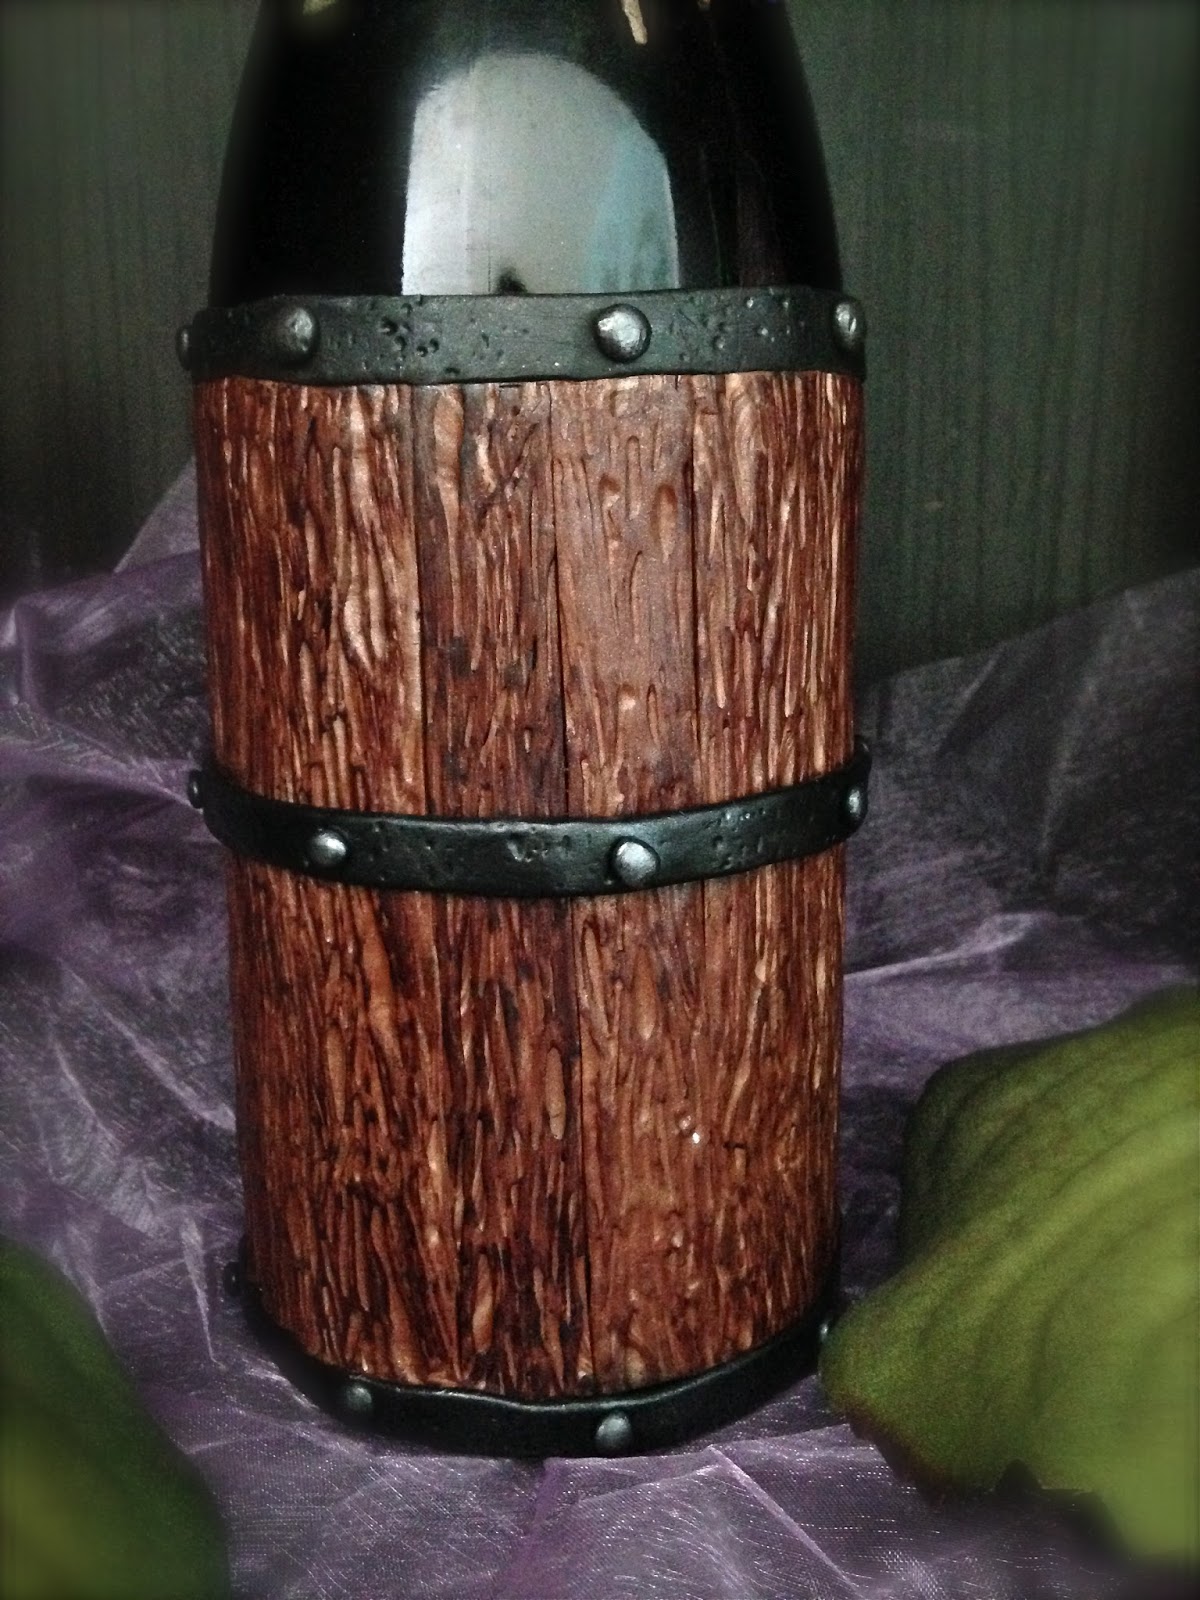
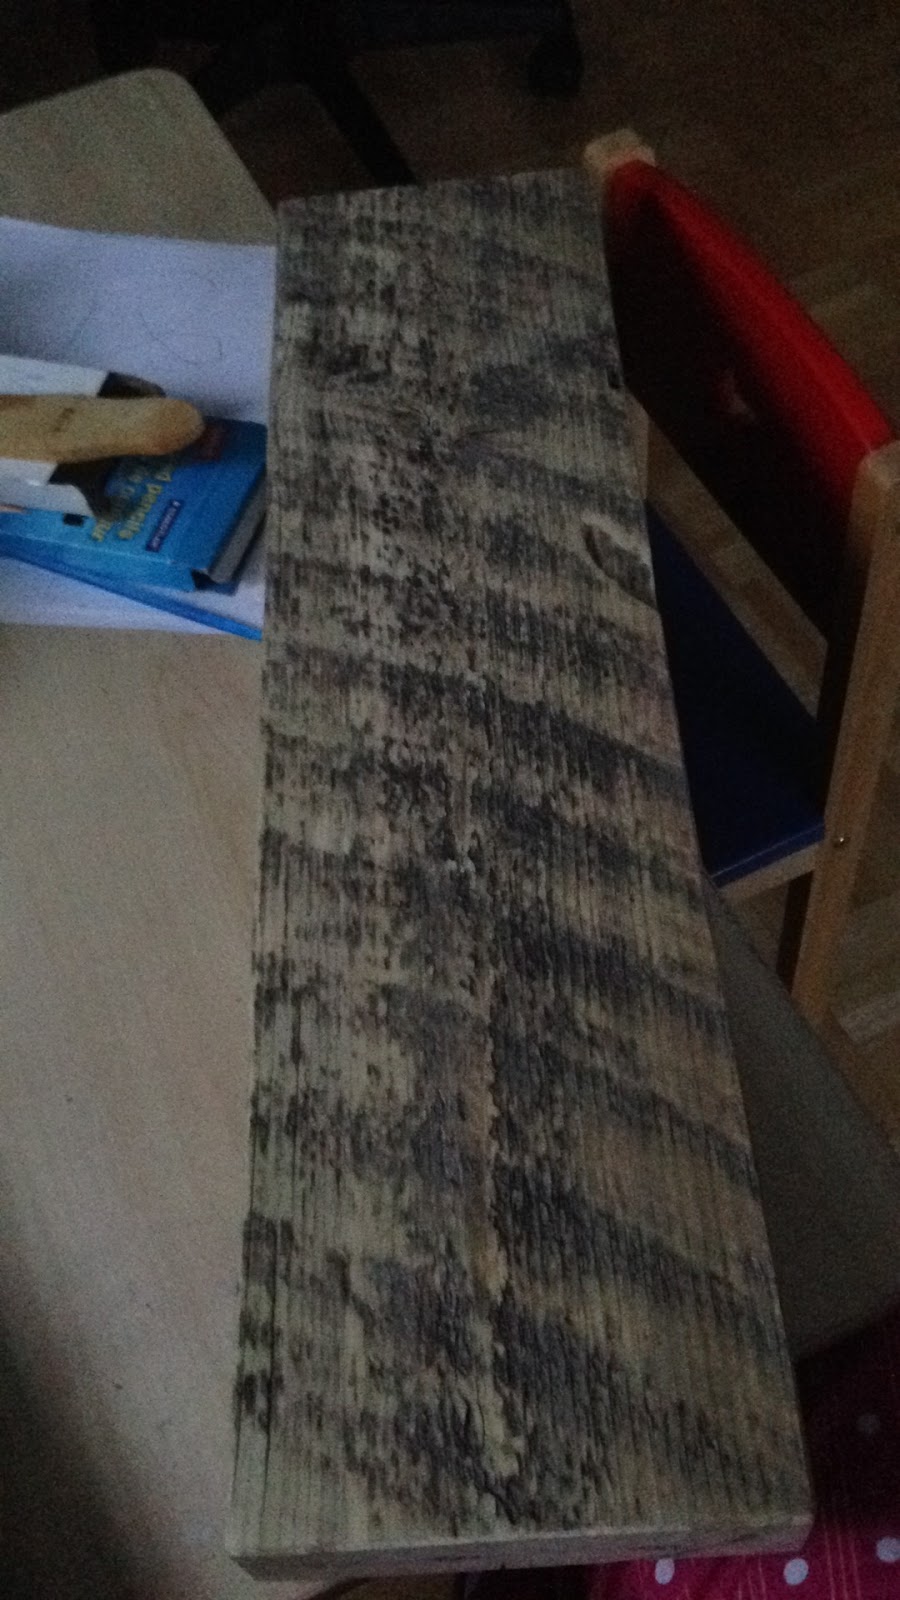
This is the reclaimed lumber about 30 yrs. old, cut & sanded.
Thanks to my husband for providing me the lumber.
I don't have experience working with wood but we made a good team :-)

I baked all pieces, finished it pym II and glued it all together 
on the wood using 3M glue.


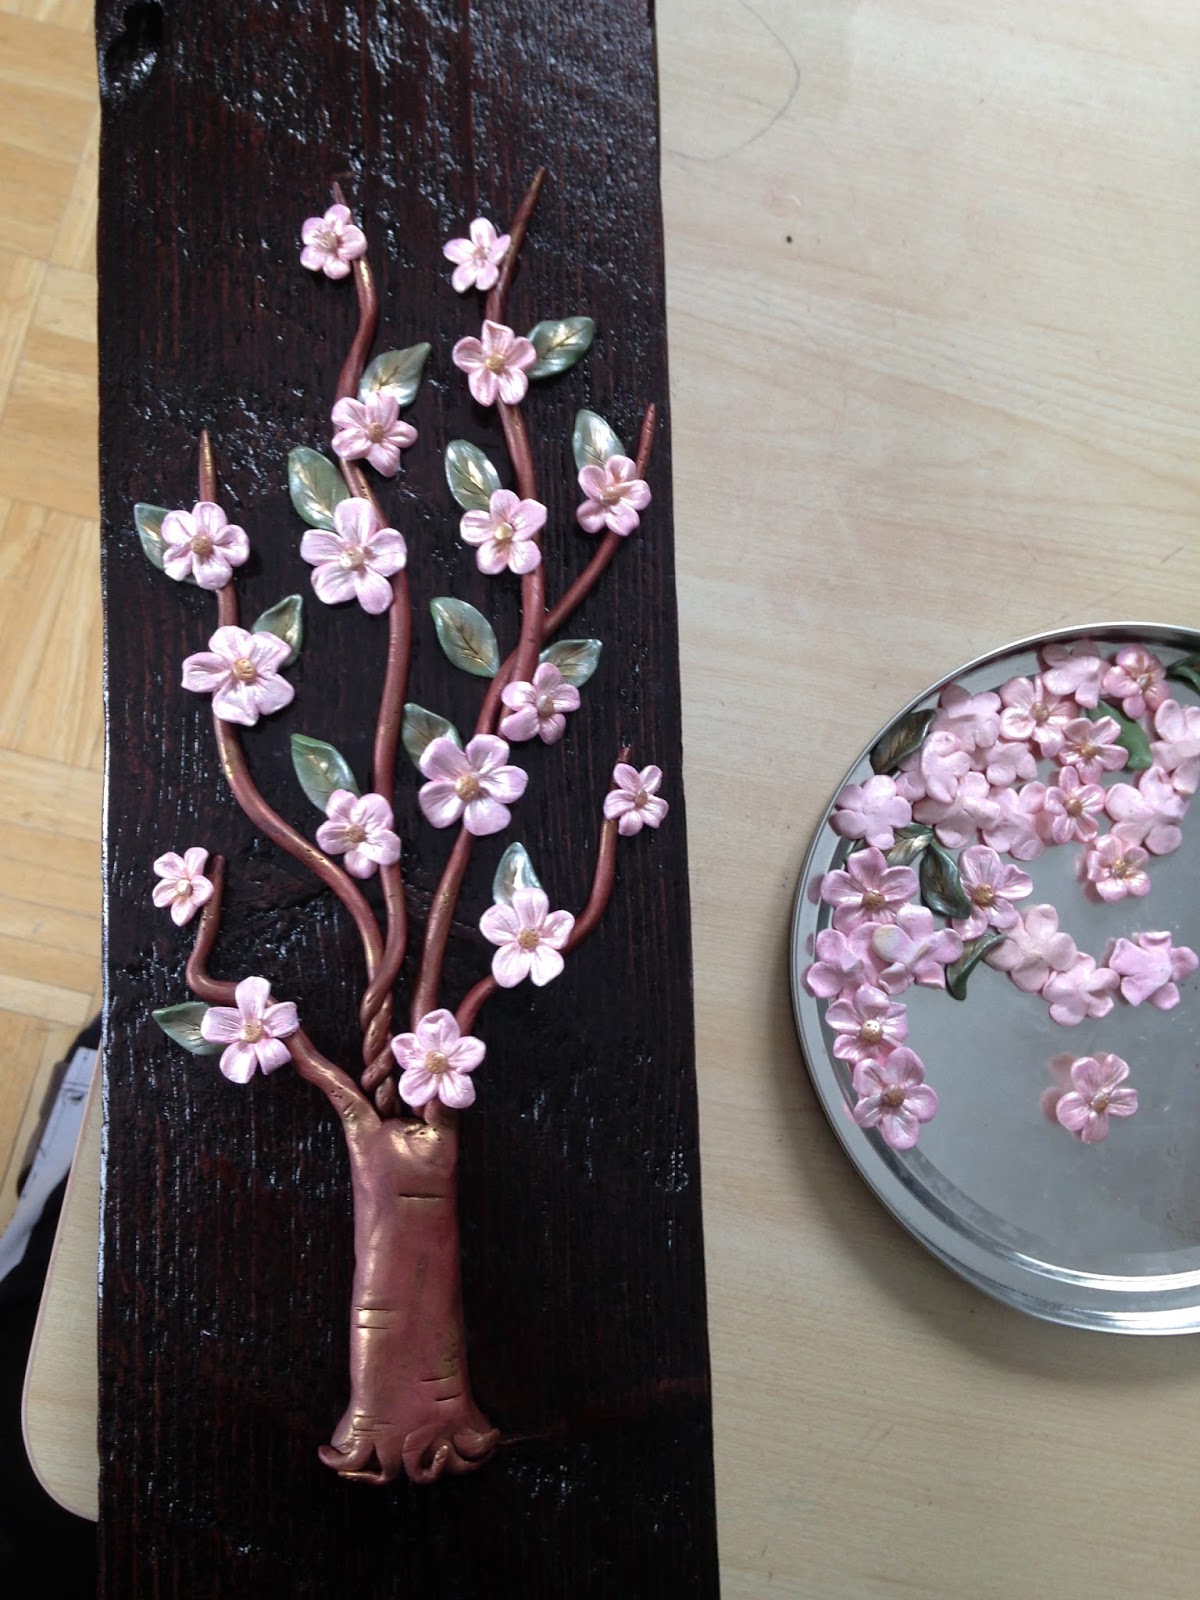
The wood was stained with Brazilian Rose gel wood stain.
It created a nice contrast with the clay design on it. I love how this reclaimed wood look. The grains, texture and distressed looks added a nice touch. It's pure rustic.


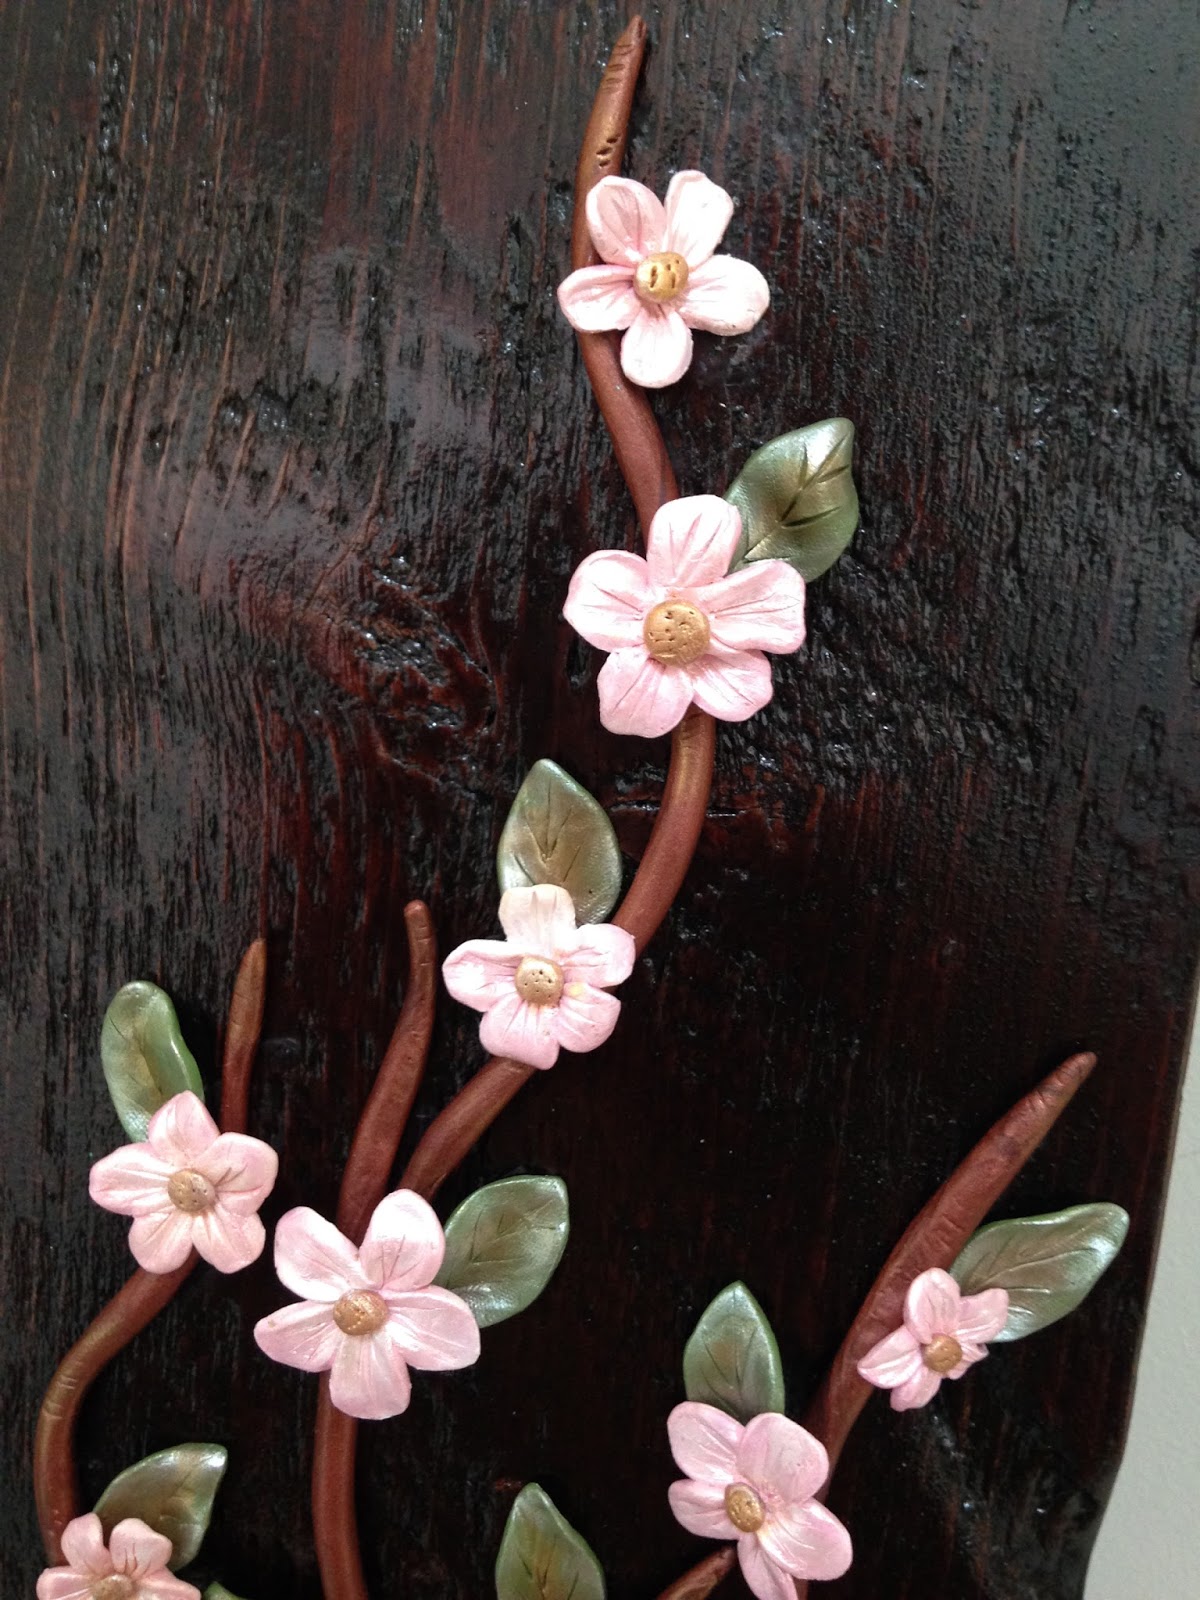
I also brushed a little antique gold on the edges of the tree and branches.


I created two planks and I tried to make it identical but unfortunately I ran out of the 
copper clay so the other tree is shorter but it's easy to glue the addition later. 


This was a fun project and I am looking forward in creating more projects with polymer clay and wood. 
Thank you for visiting my blog.
More spring project coming soon.


Saturday 5 April 2014

Metallic Shades Polymer Clay Pendant

These pendants are the new addition to my polymer clay jewelry creations.  They are Random designs with geometric shapes and burst of metallic colours using pearl ex powder.  I added glass beads on each pendant for accent. I love how these pendants turned out. It's fun and beautiful accessories.

Metallic Shades 

Materials I used for this pendants:
cookie cutters ( square, round, oval and teardrop shape)
Black & peacock pearl premo polymer clay
Crystal glass beads
Rubber Textured pad
Pearl ex ( blue, purple, gold, magenta & green)
Extruded clay was added to the sides of the of the pendant. 

Square Pendant


Oval Pendant


Teardrop Pendant


Round Pendant


Thanks for visiting my blog. 
I hope you you enjoy this weeks feature.
Check out my other pages for DIY Tutorials on polymer clay wine bottle.
New spring projects coming soon. 


Friday 21 March 2014

Grapes & Barrel Polymer Clay Wine Bottle

I love my new addition for this week.  It is a simple design yet elegant and captivating.  
This is my "Grapes & Barrel" Wine bottle. The faux wood technique I used in this project turned out really well and by adding the hanging grapes & vines around it creates a lovely accent. I achieved what I wanted for this bottle. It is like having a winery in a bottle. This piece may look simple but it will look lovely on your wine bar, kitchen counter or wine cabinets. I created a polymer clay wine stopper to complete the look for this bottle but if replaced with a real wine stopper it can be used again as a bottle.


I sculpted the vines using a combination of premo olive clay & copper clay
and the grapes is a combination of premo blue & purple pearl clay.
I cut leaves using leaf cutter and I used a silk leaf for impression.
All details were finished with gold & white pearl ex.


The Faux wood was creating using the faux wood technique and 
I added wood grain texture from Makins.
The stained the faux wood with piƱata burrow brown alcohol ink
I added premo black clay for metal straps around the barrel & studs finished with silver pearl ex.


To finish the look of the bottle, 
I created a polymer clay wine stopper with grapes. The wine stopper made a nice addition 
to the bottle. I am pretty pleased on how it look.


"Grapes & Barrel" polymer clay wine bottle. 
Simple design yet captivating.


I hope you enjoy this week's design. 
Check out my other post for DIY tutorial on how to make these lovely bottles using polymer clay.
Thank you for visiting my blog. 


Sunday 16 March 2014

Roses are Red Polymer Clay Wine

I am happy to share the latest addition to my wine bottle collection "Roses are Red" polymer clay wine bottle.  
My goal for this project is to create a ripped metal exposing something beautiful - red roses. 
I am pretty pleased on how this project turned out. The textured black clay I used created a nice metal look around the after rubbing gilders paste on it and the combination of crimson and copper premo clay gave the bottle a vibrant colour.  Roses and leaves were sculpted individually and I used a leaf from the silk flower for impression. This was a pretty easy project and it turned empty wine bottle to beautiful gift or decor. 
A great way to upcycle your empty wine bottle using polymer clay.


Materials I used for this project:
Premo clays - spanish olive, alazarin crimson, copper & black
Pearl ex-  antique gold, pearl & red russet
Baroque gilders paste - german silver & patina
Viva inca gold - silver
silk leaf - for impression
Makins sand texture sheet
Parchment paper
Polymer clay tools - cutters, roller & pasta machine


The vibrant background of the bottle was made by combining the crimson and copper premo clay.
I conditioned each colour and twist them together and run them 3 times to the pasta machine. 
I used crumpled parchment paper to create texture.


I used black clay and textured it with sand texture sheet from makins and then I finished it patina, german silver and silver gilders paste to create a metal look wrapping the bottle.


Roses are made of crimson clay. Leaves and stems are made of spanish olive clay.
I finished the roses and leaves with pearl ex - pearl, antique gold and red russet.
For leaf impression, I cut one leaf from a silk flower and stamped it on the olive green clay and a clay tool to cut around it and to create the shape of the leaf.


Here's the back photo of the bottle.


I finished the design with a rose and leaves at the top of the bottle.


"Roses are Red" a beautiful gift from the heart. 


Thank you for visiting my blog.
I hope you enjoy my design this week.
Check out my DIY tutorials on how to create these beautiful pieces.

More designs coming soon.


Sunday 9 March 2014

Magic in a Bottle Polymer Clay

My "Magic in a Bottle" polymer clay wine bottle. Another addition to my wine bottle collection.
I wasn't sure whether to leave the leather look of the bottle or make it metallic but I end up turning it to metallic look and I love how it turned out.  
For this project I used sculpey III black and brown polymer clay, an empty Asti Martini wine bottle, textured sheet, rubber stamps, glass beads, parchment paper,  baroque gilders paste & polymer clay basic tools.  
It is my first time to use sculpey III clay in a project and I find it challenging to create the details, the clay is soft to work compared to premo but the curing time was shorter at 275C in the oven for 40 minutes. 
The clay holds well on the bottle surface. Overall, I am happy I created a one of kind piece. See the magic...


The floral details of the bottle are made using rubber stamp. Then I carved it around using a clay tool.
I finished it with baroque gilders paste: pinotage, patina & antique gold.
I added a few round glass beads wrapped with small extruded clay. The small bead like dots details are made of clay and finished with gilders paste: german silver.


Part of the bottle cover was created using texture pad, like the entwined look.
The rest of the cover I used crumpled parchment paper to create a nice texture.  It also minimize the appearance of finger prints on the bottle. The parchment paper technique created a battened metal look.


To finish the look of the bottle surface. I used gilders paste: african bronze and antique gold. 


I thought a wine bottle stopper will complete the look of the bottle....
and I was right.


There is "Magic in a Bottle"
and it makes a beautiful gift and decor.


Thank you for visiting my blog.
Take time to check my other post for more inspiration, ideas and also DIY Tutorials on how to upcycle your empty wine bottles and used glass vase using polymer clay. 

More Designs coming soon.


Monday 3 March 2014

DIY Flowers & Vines Polymer Clay Wine Bottle

I am finally done with my latest project. This bottle is for my sister Faith. I think, adding a name on this bottle makes it more special and personal. It's an inexpensive beautiful gift. 
It will be a lovely piece to place on her wall shelf. 
This project took awhile to make since I used 1.5 Liter of empty wine bottle and covered the entire bottle with textured polymer clay. I am glad on how it turned out.
It's a fun way to upcycle empty wine bottle.  


Flowers & Vines


Materials I used for this project:
1.5L clean empty wine bottle
Polymer Clays ( Premo Black, Bronze, Beige & Spanish Olive)
Basic polymer clay tools & pasta machine
Textured clay (Helen Breil) (cobalt stone by makins)
Pearl ex pigments (micropearl, silver, pink gold, red russet, gold, bronze)
Basic Tools & Texture pads


I combined bronze and beige clay to cover the entire bottle.
Black clay for neck accent and the name plate
Spanish Olive for the vines 
Red & White to create pinkish colour clay for the flowers.


These are the colours of pearl ex I used for the flowers 
(micro pearl, pink gold, red russet & gold)


I used cobalt stone texture sheet from makins to create this look. 
I cut them into different sizes then layered them on the bottle.
I added small tacks from the (spanish olive clay) all the edges to
create an effect.
Then brush it with purple, bronze and silver pearl ex pigments.


I run the vines all over and added leaves and flowers. 
I combined white clay and very little red clay to create pinkish flower.
Then I brushed it with gold, red russet, micro pearl & pink gold pearl ex to create highlights.
I used bronze pear ex for the vines. 


I used black clay for the name plate and the accent I placed around the bottle neck and run it with Helen Breil's rubber textured pad to create texture.
I added the name using the spanish olive clay.
I finished it by brushing red russet, gold, silver pearl ex to create effects. 


The bottle was cured for 30 minutes at 275C.
Let it cool and Finished with PYM II


Flowers & Vines Polymer Clay Wine Bottle


I hope you enjoyed my ideas and design on this project.
Thank you for browsing my blog site. 
More Ideas and Designs coming.


Friday 21 February 2014

DIY Tutorial Beads & Butterflies Polymer Clay Wine Bottle

I just finished the new addition to my wine bottle collection.  It's Beads & Butterflies.
Another fun project using empty wine bottle.  


Materials I used for this project:
Basic polymer clay tools
Makin's texture sheet
Clean empty wine bottle
Polymer Clay -  premo peacock pearl & black
Butterfly rubber stamp
glass beads
Jacquard pearl ex - purple, blue, gold & copper
Viva inka gold ( silver) & Baroque gilders paste (german silver)

I start my project by conditioning the clay several times in the pasta machine.
In this project I am only using two colours, premo black & peacock pearl.

I placed the clay together to combined colours and run it to the pasta machine several times until I am happy on how it looks. Then, I run it once more with the texture sheet.

Once I have the textured clay. I trace pattern all over it with a pencil. You can create
 any pattern you like. 

I used cutting tool to cut around the pattern I created.

After cutting, I cleaned the edges and sides using the texture sheet. 


Now, it's time to place it on the bottle. I wrap one side of the bottle and I created another patterned clay to cover the other side. 

The bottle I used was a screw cap bottle so,  I have to cover that part. I used the same clay combination and wrap it around it and I added texture using the texture sheet.

To create the impression of a butterfly. I used a rubber stamp from inkadinkado.
My rubber stamp collection for card making comes in handy. 

I cut around the butterfly using the cutter tool. 

I wanted to create colourful butterfly. I used blue, purple, gold and copper pearl ex pigments. I applied it to the butterfly with a small brush. 

I placed the butterflies on the bottle using polybonder adhesive. I did not placed it flat on the bottle so I wanted to make sure it will stick  after curing. 


After I placed all the butterflies. I used extras of my peacock pearl clay to create round beads everywhere.  I placed small glass beads in the middle.


I cured the bottle at 275C in the oven for 40 mins. 

After it cooled down. I dab small amount of viva inka gold (silver) around the cover to create a metallic look. 

I added some gold Baroque gilders paste (german silver) for effects on my metal cover. 

Last step: I wipe excess of the paste with cotton cloth and then finish it with PYM II.
I strung bronze glass beads and wrap it around the neck of the bottle for accent. 


Finished Project:


This is another Fun project using empty bottle and polymer clay. 
I hope you enjoyed this tutorial and thank you for visiting  my blog.

More designs and ideas coming soon.